Woodworking Blog

This is the collection area of all of the writings I've made that pertain to woodworking in its various forms.

Lighthouse update: Touchscreen interface

  • Posted on: 29 August 2023
  • By: Jay Oyster

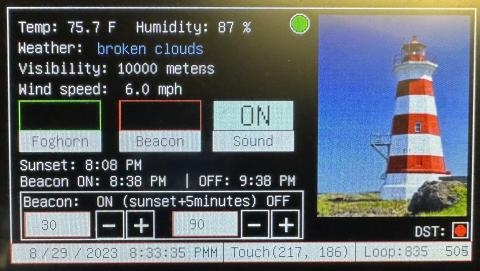
It’s been a while, huh? The last time I put out an update, I had finished getting the clock and the screen attached to the microprocessor board. Prior to that, I had hooked up the two sound boards and wired some basic speakers in place. This time, I’m going to describe how the touchscreen user interface is laid out. This was a long, iterative process, but I’m just going to describe the features as it ended up. (perhaps with a couple of asides about other things I tried in certain areas.)


Sample of the python-driven touchscreen interface running on the M4 board

Lighthouse update: Adding Screen and Coding

  • Posted on: 19 May 2023
  • By: Jay Oyster

OK, to reiterate where we are in the build of this Smart Weather Lighthouse build, up to this point I had configured the sound files and sound boards to play when triggered, and powered on and loaded Circuitpython on the Metro MX  board. Up next, I'll go through how I got the 4.7" touchscreen attached and operating. And then talk about getting data back to the Metro board using the OpenWeather API, and finally, attaching the clock.

  • Configuring the sound boards, speakers and audio sample files - DONE
  • Setting up the MX board with Circuitpython and activating wifi and basic code - DONE
  • Attaching the touchscreen driver board and touchscreen to the Metro MX board - This update
  • Initializing the Openweathermap API calls for local weather data - This update
  • Attaching the realtime clock board to the Metro MX - This update
  • Building the basic touchscreen user interface
  • Wiring the lighthouse lights and motor to the Metro MX board
  • Triggering sound effects with the Metro MX Board
  • Building the wooden lighthouse base Installing the electronics into the base

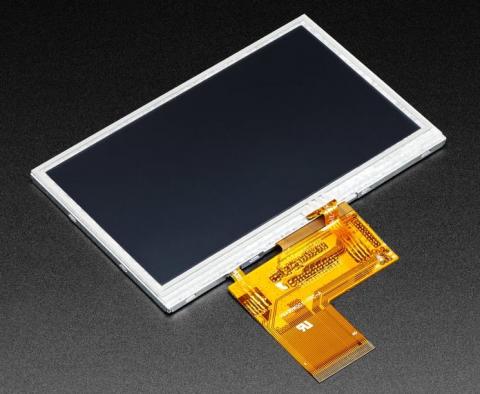
Screen used: 4.3" 40-pin TFT Display - 480x272 with Touchscreen

Lighthouse update: Soundboards and MX Board Setup

  • Posted on: 17 May 2023
  • By: Jay Oyster

So far, I've described the overall idea for the smart weather lighthouse, and what the various systems of the build will be, but let me lay out the stages to this build . . . since it is a bit complicated. These are the steps I went through to pull it together:

  • Configuring the sound boards, speakers and audio sample files
  • Setting up the MX board with Circuitpython and activating wifi and basic code
  • Attaching the touchscreen driver board and touchscreen to the MX board
  • Initializing the Openweathermap API calls for local weather data
  • Attaching the realtime clock board to the MX
  • Building the basic touchscreen user interface
  • Wiring the lighthouse lights and motor to the MX board
  • Triggering sound effects with the MX Board
  • Building the wooden lighthouse base
  • Installing the electronics into the base

I have to say that I couldn't have pulled together all of the electonics and coding without the excellent support of the Adafruit projects and learning pages.

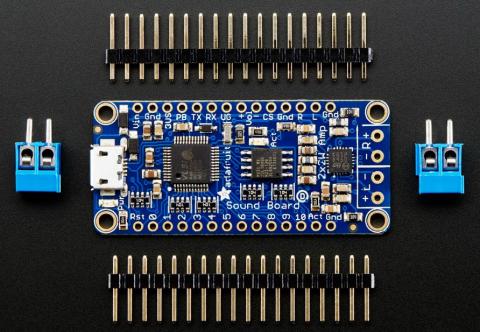
Adafruit Soundboard FX board with headers and speaker terminals

Lighthouse update: Block Diagram and Prototyping

  • Posted on: 3 May 2023
  • By: Jay Oyster

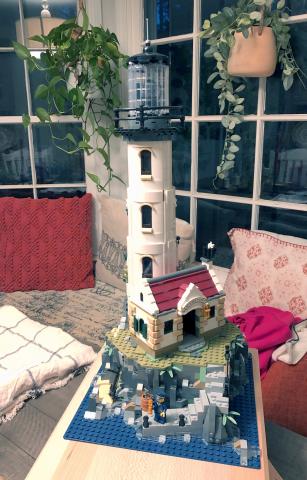
OK, thinking back to the beginning of this effort in January and February, I had a basic idea of what I wanted to accomplish in this build. First, I wanted the lighthouse itself to look pretty-much stock, as designed by Lego. I just want it to function with more autonomy.

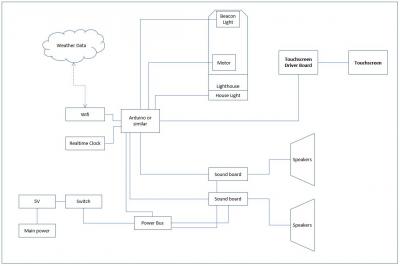
Block diagram of the electronics

Basic design of the lighthouse automation systemSo starting with a basic set of functions and I how I saw it coming together initially . . . this is not that different from what I ended up building. Here are the basic components:

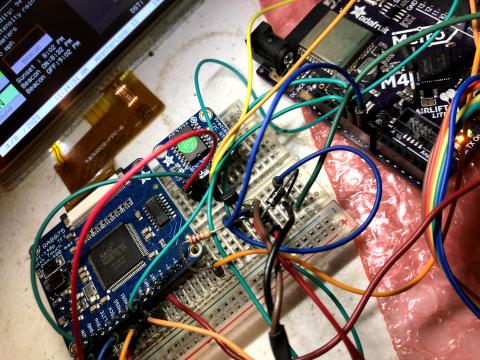
Prototyping the electronics for the updated lighthouse

Beginning Main Box Joinery

  • Posted on: 10 April 2023
  • By: Jay Oyster

I haven't posted on the Tansu Teabox project in quite awhile, but I have been working on it. Slowly, as ever. But after a couple of major side-tracks in the maintenance of my basement shop, I also had problems with my website, as I've mentioned elsewhere here. But in between, I did manage to make a bit of progress on the teabox. Last December, I finally resawed the sidewall pieces to the 1/4 to 1/2" thick pieces needed for the box shell, and planed them down and joined them, then cut to final dimensions.  Through all of that, I neglected to take any photos. 

But after a major effort to fix the flooding problem in my shop this past year, I got my tools put back . .  in particular my workbench. With the bench back, I started working on the dovetails for the teabox case.

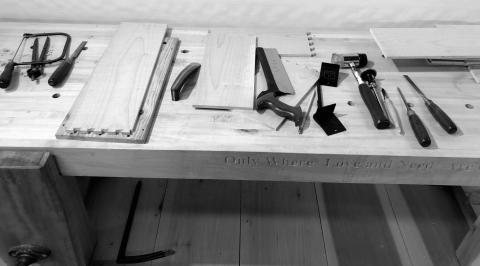
Cutting dovetails of the main box case

Tansu Teabox: Basic dimensions and cutting raw parts

  • Posted on: 22 November 2021
  • By: Jay Oyster

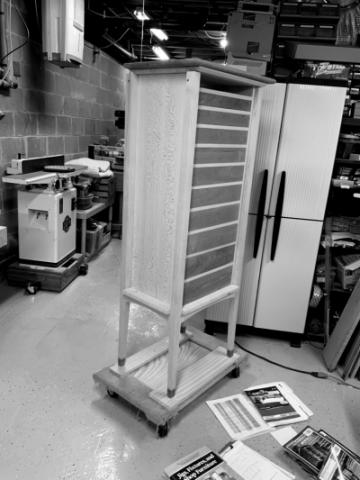
For the teabox, I laid out a basic step-style tansu cabinet layout, with 10 drawers and two doors, and space at the top right where I can put a couple of steeping tea cups.

So the dimensions I started with to determine what size to make the teabox were the two Adagio tea infuser mugs, similar to this.  Each of these is about 3 1/2" wide and 5" tall, with the infuser and glass top  in place. I decided to use the top step of the box, on the right side, as a place to store these two mugs. So a 5" step down from the top height. 

The overall box height is limited by cabinets in our kitchen. That's 16" of space. 

The width needs to fit in with the rest of our counter items. I decided to go a bit wide, so 20". It'll be a focal piece in our kitchen.

In terms of depth, I wanted the drawers to be functional, not bottomless cubbies I couldn't reach the back of. I thought between 5" and 7" deep. So I split the difference and decided on a 6" deep box.

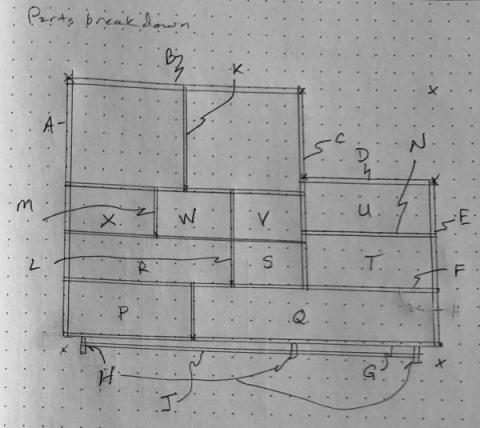
Labels for the parts list

Finishing side doors and adding hinges

  • Posted on: 12 October 2020
  • By: Jay Oyster

Cutting recess to house side hingesCompressing a bit of the work here. I built the side doors, mortise and tenon corner joints (See photo), routed grooves for the panel. I glued up the center panel of 100% quarter-sawn sycamore. Finding clear, white pieces of sycamore among the remaining stock I had was a big challenge. In the end, I managed to get a clear face on one side for the outsides of the door. I debated what to do about the inside of each door. Finally, I opted to use some of the washi (Shoji screen paper) I had ordered for the front door, and taped in down at the edges on the inside of the door, covering the panel. I'll show photos of that on the completed project.

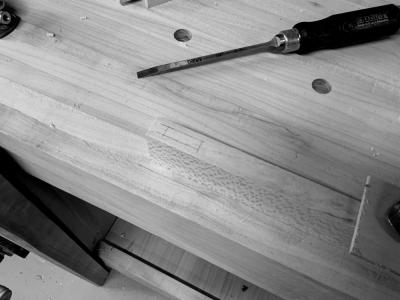
But up next was mounting the side doors. I ordered two pair of the smaller 1 1/4" tall Brusso (CB-302) butt hinges. Damn they're expensive.  And I suppose that they're worth it, but it is such a premium these days to support American manufacturers. I did take some photos of the process as I cut the shallow mortises to house the hinges on the doors. Rather than a router, I just used some newly sharpened chisels and cut them out by hand. 

January 2020 - Bringing the Project back to Life

  • Posted on: 30 January 2020
  • By: Jay Oyster

OK, after moving four times in six years, I had two projects that I'd dragged along all across those moves . . . my workbench, and my wife's jewelry cabinet. Both projects were approaching 10 years from start, and I was both embarrassed and tired of not having them done. So last year (2019) I finally finshed the workbench. And in January 2020, after doing a bit of a reorg in my shop, I was finally ready to make the final push to complete the Jewelry cabinet.

Using the newly finished workbench to build the side doors of the jewelry cabinetI didn't even know for sure if I had managed to keep all of the pieces to build the rest of it. So the first thing I did was to assess the project and find the cut parts in amongst the piles of wood that I moved between the various houses. I did find all of the pieces, especially for the side and front doors. But it was a bit of a jigsaw. The side doors, particulalry, had several large pieces of fairly thin quarter-sawn  sycamore that I need to glue together into panels. And I knew that I couldn't get two faces that were clean, meaning two faces of white sapwood. So a big part of the next step was deciding on an approach to glue up and size the panels for the side doors. 

After reclaiming the shop, I needed to assess where I left the jewelry cabinet project

Final week of work to finish mudroom bench

  • Posted on: 10 November 2018
  • By: Jay Oyster

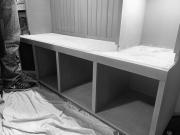
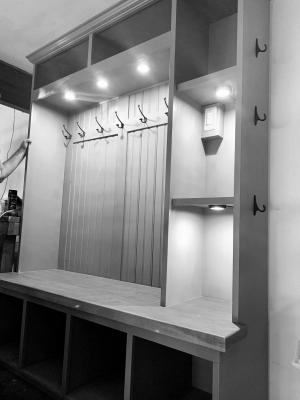
Finishing up the paint. Benchseat not yet installed.September 2018 - I got some help to move the case up from my basement shop to the garage. Thank you very much Kamil. Once it was in place there, I worked on getting the crown molding installed, as well as the lighting. Once those were in place, I took a couple of weeks to paint the whole piece with General Finishes "Charleton Blue" chalk paint. It took two coats with a quick sanding after the first. 

Finished bench, seat installed, lighting working, hardware installed.October 13, 2018 - This is the weekend I finished this project. Sprayed the whole case with lacquer. (I don't have a HVLP spray rig, so it was rattle cans from the  big box store. $12 a pop for those cans, but the result was worth it. ) 

Then it was the struggle of getting the 2 1/2" thick cherry seat installed. Boy, that was a challenge. It had fit perfectly in the shop, but of course, after the paint was applied to the case, and of course the higher humidity of the garage space where it's installed, it didn't quite fit. I had to haul the seat back to the shop and sand and plane a bit more to get the clearance needed to make it fit. It's a very tight fit, specifically in the center where the seat fits tightly around the center vertical shelf piece.  

Cutting Plywood and Poplar

  • Posted on: 4 February 2018
  • By: Jay Oyster

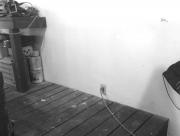
Wall where the mudroom bench will be installed. I have a power outlet to move.Mudroom Bench Project — For everything but the solid wood benchtop, this was a project to be supplied quickly and conveniently at the big box store. I did spend more time than normal looking through the plywood and poplar choices to make as clean a selection as I could given their generally lower standards. But I ended up bringing home three sheets of 3/4" birch ply, 1 sheet of 3/4" 'Sandply', 3 sheets of 1/4" birch ply for the backs, and numerous pieces of 1x6 poplar for the face frames and crown molding. My helpers - Liam, Elle, and Remington I also thought about whether or not I wanted to route the bead board backing of the seat area, and ended up by pre-formed and primed whitewood  bead boards. That should save me some time.  I also bought some sacraficial plastic sawhorses. 

I brought it all home and stored it in the garage for a day. I checked out the physical location of the bench and realized that I have a power outlet to move. (And clearly some Halloween decorations to move . . . oh, and my old Kaypro II computer, purchased in 1983.) As I was working, Liam and his friend from the neighborhood Elly showed up with her dog Remington. I enlisted Liam to help out. 

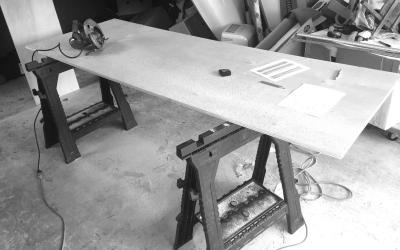
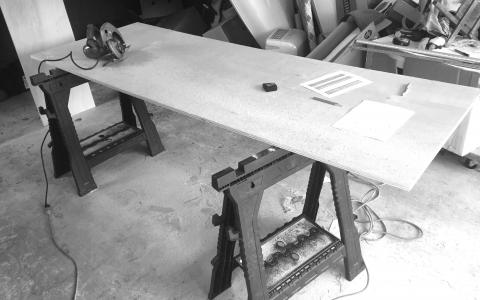
Breaking down the sheetgoods in the garageThen I set up my saw horses and my cut list, and carefully cut down the 4x8 sheets into the approximate widths I needed for all of the larger pieces. After cutting them down, I carried down into the basement shop through the door  on the other side of the house; the one place where the basement isn't below grade.  For the smaller pieces, I had Liam carry them. He's 11 . . .old enough to start earning his keep.

Breaking down the sheetgoods in the garage

Fitting the Piece to the Place

  • Posted on: 3 February 2018
  • By: Jay Oyster

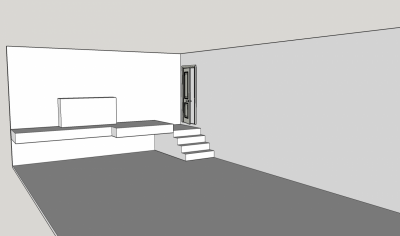
The area in the garage where the bench will go, top of the stairs, to the left of the door, up on the deck.The mudbench is going into the front corner of our garage. As I described on the project page, our garage has a raised deck at the front where the previous owner built a small workbench, and then some storage space where we've got some shelves. The area near the side door into the kitchen was previous just a catch-all space where the kids threw their backpacks and jackets and such. We still want to use it for that, but we want to be able to have some organization, and so I won't be tripping over their shit all the time.

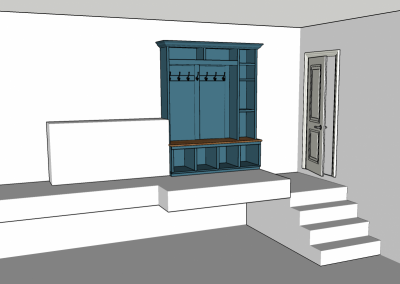
I mocked up the basic space with correct dimension in Sketchup. (See at right)  The model doesn't include the railing along the near edge of the deck, and up the left side of the stairs.  The workbench is just a 2x4 and plywood structure that I've represented by an accurately sized rectangle in the middle of the deck. 

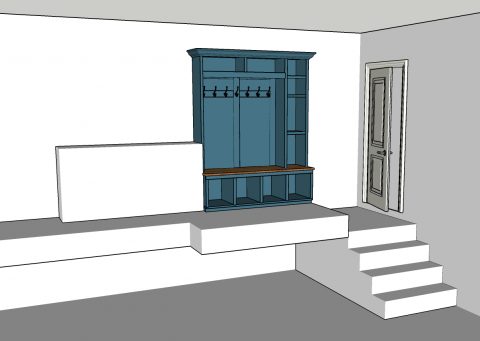
Bench design in the intended location. This was my prototype test to see how it would look in place.

So I took the bench design I worked on over the holidays and placed it in the model to see how it looked spatially, and as a design. To my eye and my wife's eye, it looks good there. She particularly likes the color.

Garage deck with bench in place, deck railing removed for clarity

Installed Wagon Vice and Turned Benchdogs

  • Posted on: 3 September 2017
  • By: Jay Oyster

September 3rd, 2017 - Installed the Wagon vice and turned a set of bench dogs

I've done a lot of work in my shop the last two months. I just haven't had the time to post about it. Because of that, I'm going to summarize. I also didn't get pictures of a lot of this.

Completed install of the wagon viceSo I installed the Benchcrafted wagon vice hardware, and shaped the vice block from a piece of hard maple. ( A piece of 12/4 left over from my hall table project way back in 2005 or something.) I got the vice mounted cleanly and shimmed so the screw and vice block turn easily all the way from one end of the slot to the other. That took a couple of days of fiddling to get right.

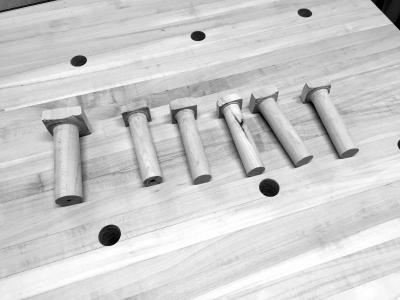
Bench dogs turned out of hard maple. I had a bit of trouble with the tops.Then I went in and drill dog  holes in my bench top. Two rows of 3/4" diameter holes down the length of the bench. I picked 3/4" because I assumed that was the standard. Every bench dog fixture from Veritas, and every available holdfast on the market is 3/4", so no big whoop picking that size, right? No, of course not. I now find out that The Schwartz has come in and decided to screw up one of the only universally accepted standards in the hand tool woodworking world. (I only found out about his new company, Crucible, and their 1" diameter holdfast a few days. I think I want to write my take on his justification 'rant' in a separate article.

Up next, I squared up a length of that very same 12/4" hard maple, pulled out and dusted off my trusty Harbor Freight lathe, and turned some wooden bench dogs. That was fun. 

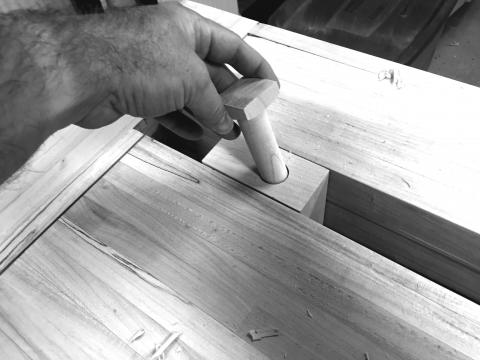
Wagon Vice in place, installing 1" bench dog

Pinning the Legs

  • Posted on: 13 August 2017
  • By: Jay Oyster

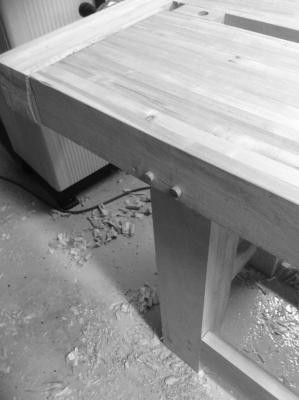
Bench legs pinned to the top, pegs still proud of the faceAfter I cut the opening for the wagon vise on the top of the bench, and spent the time to get the leg mortises sized correctly on the bottom of the bench, I debated whether to glue the legs, or pin the legs, or leave them as they are.  In the fitting, I had to pound quite hard to get the legs to seat in the benchtop mortises. I figured it was going to be near-on impossible to pull it apart without rigging up a rope and pulley system of some sort.  Still, I also know that working on this thing will involve lots of pounding, and Murphy being who he is, it will eventually start working loose. So I needed to reinforce the connection without having to pull it apart first. Pins it is.

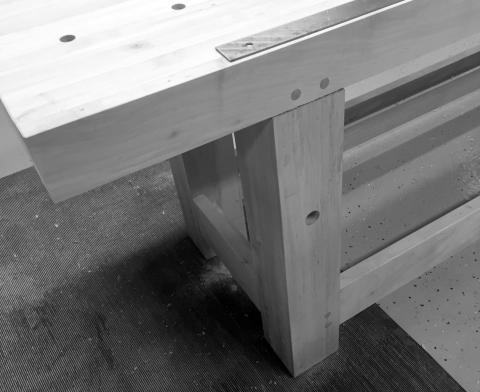
I bought some 3/8" diameter oak dowels, drilled two holes in the front and back face of the bench where the leg sits in it's mortise, and then glued and drove home the dowels.  The drilling was the tricky part here. I wanted the face of the hole to be clean, so I used a 3/8" forstner bit to start the holes, but I don't have a forstner bit long enough to go in deep enough to drill through to the other side of the leg's tenon. (I wanted to make sure the pin was seated in the benchtop wood on both sides of the leg.)  So after starting the holes, I realized I needed a really long 3/8" drill bit. So off to Lowes I went. I bought several of those really long auger type bits commonly used in constuction. 

Completed pins installed through leg tenons

Fitting the Tail Vice

  • Posted on: 6 July 2017
  • By: Jay Oyster

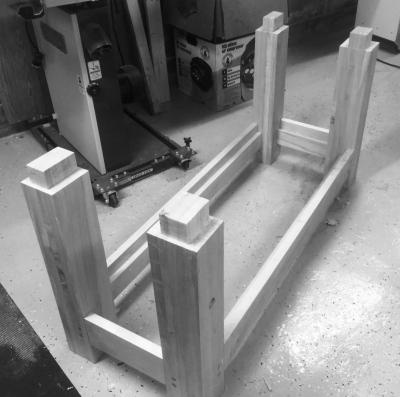
Sizing the tenons to fit the mortises in the benchtopIt's been three years ago now that I purchased a Benchcrafted tail vice for this workbench. And we're just about up to the sixth anniversary of this build. Yeesh.

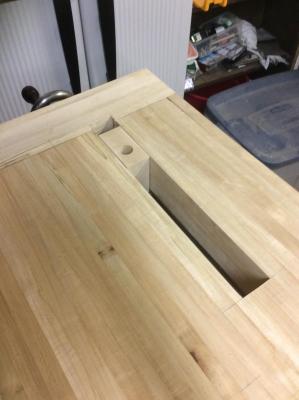
No more on that. In our fourth home, you know, the permanent one, I've gotten my shop in shape enough to get moving.  On this project it meant one of the big technical challenges, installing the tail vice. Well, in all honesty, I was just trying to fit the undercarriage tenons to the top, and I realized that once I got the pieces together, I was unlikely to ever get them apart again . . . so I'd better cut the other parts I need cut on this benchtop while I have the chance.

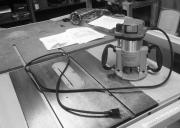
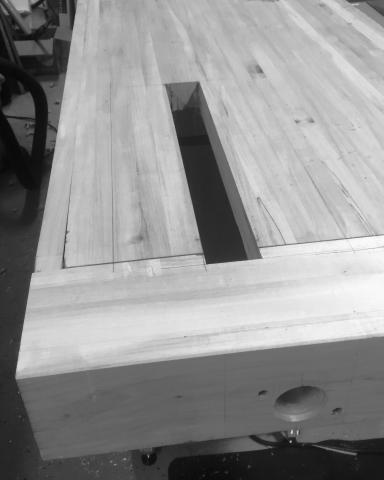
Tool of choice to cut big slots in a giant butcher block slabI did muscle the top onto the undercarriage once, and then marked up the cheeks that needed to be shaved to fit. I added a number (1), (2), or (3) to indicate the magnitude of material removal required for each cheek. Then I hauled the top back over to my outfeed table to work on the tail vice stuff. That thing is heavy! I don't know how much it is. Wait, I can do this. The Wood Database says dried silver maple weighs an average of 33 lb/ft³. The top is about 96" long by 27" wide by 3 3/4" thick. That's 9720 in³. Divide by 1728 in³ in 1 ft³, so 9720/1728, or 5.625 cubic feet of silver maple in the top. 185 pounds for the top. And I'm hauling it single handed. It's not heavy. It's awkward. (Nah, this shit's heavy.)

Tail vice recess cut into the benchtop, fitted to the Benchcrafted hardware

Pages