Electronics and Software

Electronics and Software Creation

Lighthouse update: Touchscreen interface

  • Posted on: 29 August 2023
  • By: Jay Oyster

It’s been a while, huh? The last time I put out an update, I had finished getting the clock and the screen attached to the microprocessor board. Prior to that, I had hooked up the two sound boards and wired some basic speakers in place. This time, I’m going to describe how the touchscreen user interface is laid out. This was a long, iterative process, but I’m just going to describe the features as it ended up. (perhaps with a couple of asides about other things I tried in certain areas.)


Sample of the python-driven touchscreen interface running on the M4 board

Lighthouse update: Adding Screen and Coding

  • Posted on: 19 May 2023
  • By: Jay Oyster

OK, to reiterate where we are in the build of this Smart Weather Lighthouse build, up to this point I had configured the sound files and sound boards to play when triggered, and powered on and loaded Circuitpython on the Metro MX  board. Up next, I'll go through how I got the 4.7" touchscreen attached and operating. And then talk about getting data back to the Metro board using the OpenWeather API, and finally, attaching the clock.

  • Configuring the sound boards, speakers and audio sample files - DONE
  • Setting up the MX board with Circuitpython and activating wifi and basic code - DONE
  • Attaching the touchscreen driver board and touchscreen to the Metro MX board - This update
  • Initializing the Openweathermap API calls for local weather data - This update
  • Attaching the realtime clock board to the Metro MX - This update
  • Building the basic touchscreen user interface
  • Wiring the lighthouse lights and motor to the Metro MX board
  • Triggering sound effects with the Metro MX Board
  • Building the wooden lighthouse base Installing the electronics into the base

Screen used: 4.3" 40-pin TFT Display - 480x272 with Touchscreen

Lighthouse update: Soundboards and MX Board Setup

  • Posted on: 17 May 2023
  • By: Jay Oyster

So far, I've described the overall idea for the smart weather lighthouse, and what the various systems of the build will be, but let me lay out the stages to this build . . . since it is a bit complicated. These are the steps I went through to pull it together:

  • Configuring the sound boards, speakers and audio sample files
  • Setting up the MX board with Circuitpython and activating wifi and basic code
  • Attaching the touchscreen driver board and touchscreen to the MX board
  • Initializing the Openweathermap API calls for local weather data
  • Attaching the realtime clock board to the MX
  • Building the basic touchscreen user interface
  • Wiring the lighthouse lights and motor to the MX board
  • Triggering sound effects with the MX Board
  • Building the wooden lighthouse base
  • Installing the electronics into the base

I have to say that I couldn't have pulled together all of the electonics and coding without the excellent support of the Adafruit projects and learning pages.

Adafruit Soundboard FX board with headers and speaker terminals

Lighthouse update: Block Diagram and Prototyping

  • Posted on: 3 May 2023
  • By: Jay Oyster

OK, thinking back to the beginning of this effort in January and February, I had a basic idea of what I wanted to accomplish in this build. First, I wanted the lighthouse itself to look pretty-much stock, as designed by Lego. I just want it to function with more autonomy.

Block diagram of the electronics

Basic design of the lighthouse automation systemSo starting with a basic set of functions and I how I saw it coming together initially . . . this is not that different from what I ended up building. Here are the basic components:

Prototyping the electronics for the updated lighthouse

Book Review: Exploring Arduino by Jeremy Blum

  • Posted on: 24 August 2015
  • By: Jay Oyster

Review of “Exploring Arduino: Tools and Techniques for Engineering Wizardry” by Jeremy Blum. Reviewed on August 24th, 2015.

Exploring Arduino, by Jeremy Blum. John Wiley and Sons, Inc. 2013.I’m coming to review this book rather late. It was published in late 2013, I believe, but I’ve only recently purchased it and wanted to pipe up with my two cents’ worth. As many people can probably say,  I originally encountered the works of Jeremy Blum on YouTube. I bought my first Arduino board in late 2013. Being a busy professional and father, I didn’t have a whole lot of time to play around with it, although I truly did want to play. But I can’t really learn new things in a vacuum, so I quickly developed a project to use my first board on: a timing track for my son’s Boxwood Derby car. (He had a brief interest in the Cub Scouts, which has long since waned.) So searching the Intertubes for training materials on the Arduino was natural. I looked at many of them, but by far the best at least in my opinion, were the short videos produced on the topic by Jeremy Blum with the support of the electronics supply company Element 14. (Note: I have no association with the author or any of the companies mentioned here.)

Jeremy Blum is the host of a series of 15 tutorials for working with Arduinos, sponsored by Element 14I used those Arduino Tutorial videos to bring myself up to speed quickly. I actually managed to get a timing circuit built in time for my son to enter his car in an elementary school science fair. True, we only re-proved what Galileo figured out in 1638, but still, it’s always nice to see that the laws of physics haven’t changed. I was very grateful to Mr. Blum for his guidance. At the time, I remember being astonished that such clear, cleanly explained training films existed for the Arduino and that they had been created by an undergraduate engineering student! When he announced that he was writing a book, I sort of felt like I owed it to him to buy and read it. (Plus, he had helped to get me hooked on this whole open-source hardware maker movement, so I was naturally curious to learn more.)

To summarize my perspective on the book, I’m a working IT professional who had introductory practical electronics courses as a Physics student nearly 30 years ago, so many of the concepts here aren’t new to me. I’ve played around with small circuits on my own for many years, but I was never really a hobbyist, more of a dabbler. But with the arrival of the Arduino and the Raspbery Pi, I finally had the opportunity to try out working with microcontrollers. I had always been a bit too busy and perhaps slightly intimidated to take that particular plunge. I think maybe that’s Jeremy’s best trait, he makes you unafraid to try out new things. The other thing I should mention here is that I've worked as a technical writer for many years, so I'm aware of the technical aspects of putting together this kind of hardware/software instructional book. It's a unique kind of challenge to write about both technical hardware and software in a combined work.

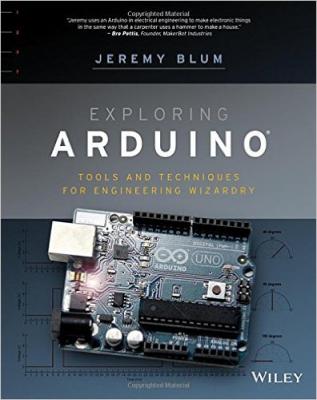
So, the book . . . I bought the paperback on Amazon during a month in which Mr. Blum turned out to be donating his profits to young, women engineers. I can certainly get behind that cause and I’m glad it worked out that way. The book, printed by Wiley is nicely printed. I like the texture and design of the cover. The pages are fairly standard for technology/programming books, black and white on a medium-light weight, matte stock. The layout of chapters are clean and crisp; the typography clear and legible and the illustrations printed well in greyscale. The illustrations are basically an even mixture of screen grabs of the Arduino IDE interface, what looks to be Mac OS X operating system windows and elements, circuit diagrams done in Fritzing, a few photos likely taken by the author, and a few black and white diagrams of key concepts.

The structure follows the YouTube tutorial videos pretty closely, introducing elementary engineering principles first and then moving on to the basics of how a microcontroller works, the practical capabilities of an Arduino, and then simple and more complex projects created with one. Usually, the author sticks with the Arduino Uno, but he does acknowledge and occasionally even suggest projects for the other models. He starts each chapter calling out the digital resources available related to the material in the chapter, which is nice. He naturally links back to his tutorial videos, but he isn’t shy pointing to other valuable online resources. All of the sketches, diagrams and schematic files he uses are available on a custom website supporting the book. (www.exploringarduino.com)

New Shop Cam

  • Posted on: 11 August 2015
  • By: Jay Oyster

Live picture of my home woodshopI've finally publicly posted the page for my three home cameras. I put them out here mostly for my own amusement, and also as a way to share what I'm working on and what the weather is in my parts with members of my extended family. I've currently got three cameras:

  • a shop camera
  • a camera pointed out the back window of my shop at the woods behind our house
  • a camera aimed out our front window at our sidewalk and yard

Honestly,  this is mostly an excuse to play around with webcams, home security software, and the ins-and-outs of my home wifi network.  It's been an education . . . to which I will soon subject my boys.  (evil laugh)

I'm sorry, but learning routing, IP networking standards, and how to deal with wifi devices is just going to be a right-of-passage for children of this coming generation . . . just like when kids had to learn how to milk a cow by hand and fix an internal combustion engine back in the hazy days of the mid-20th century. 

My shop cam page can be found here.


War in Arduino World

  • Posted on: 20 March 2015
  • By: Jay Oyster

I just happened to be on Google+ today when a posting came across the wire about Massimo Banzi's recent blog post on the Arduino blog. Massimo Banzi is, as most people know, one of the five founders of the Arduino open-source hardware movement. I first learned about the Arduino board by listening to a FLOSS Weekly episode in which he was interviewed. I truly believe he really is a  believer in open source and the democratization of technology. So it's sad to hear that the core of the Arduino world is in the midst of a civil war. It seems that one of the other five founding members, Gianluca Martino, has gone and run off with a key Arduino trademark and started claiming the name through his company.

Although sad, it doesn't strike me as very surprising. Any time humans attempt to create a truly altruistic community, there are times when some of the baser instincts of human nature show up and start mucking things up. Now, reading his blog post, and a longer article on Make that details the history of the conflict, my immediate reaction was, "Well, that's clear. It's obvious who's in the wrong." I was hopeful that it would be cleared up quickly. But reading the comments under the Make article, which was posted over 24 hours ago, I should have known better. Some, possibly trolls for the other side, immediately skewered the article and Mr. Banzi as one-sided and unfair. Possibly. I agree that it is important to hear the other side of the argument. 

Attached Timer to the Track

  • Posted on: 27 February 2014
  • By: Jay Oyster

I had to get the Arduino timer mounted on the track so Liam can run some tests for his science expo before this weekend.  Wednesday, I drilled holes in the sides of the track at 25cm from the top and 30cm from the bottom to mount the 'light beam' LEDs on the right side and the photoresistor sensors on the left side (as you look from the top of the track to the bottom.) Used hot glue to position the LEDs in the holes. Then I powered the LEDs so I could see exactly where the beam of light hit the opposite rail. That's when I drilled the holes for the sensors. Then I hot glued the sensors in place.

Since I need to get Liam to do his measurements soon, I just wired the LEDs into the breadboard to feed the Arduino inputs using jury rigged wires for now. It's not pretty, but it works. I ran his pinewood derby car down the track and took the first measurement at about midnight last night! Yay!  :-) 

I'm getting approximately 1.036 seconds for it to run with no extra weight, plus or minus about 0.006 seconds. I repeated the run about 15 times and got readings from around 1.029 to 1.042 seconds. Not too shabby.

Pinewood Derby Car #1

Timer Prototype Finished

  • Posted on: 19 February 2014
  • By: Jay Oyster

February 19, 2014 - OK, I first posted on this project a couple of days ago. I've got a short window to get this working. Liam's science expo is on March 7th, and I need to complete the track (with attached timer) in time so Liam and I can run a set of experiments. So late last night, I managed to finish the prototype of the Arduino timer I plan to mount to the side of the test track. It's all breadboarded now, and I'll probably just use the prototype to run the timing for Liam. After we get some results on paper, I'll worry about turning this into a sturdy version permanently attached to the side of the track.

Layout of the prototypeThe hardware work was basically done last week. I just needed to figure out the update to the sketch to figure out how to trigger the timing code using the inputs from the two photo-resistor sensors.  The picture here shows the prototype board, as it's currently working. Click the image to enlarge it.

Timer with LCD and two LED/photoresistor pairs to detect start and stop times, with Sketch#30 running

Arduino Stopwatch timer for Science expo project

  • Posted on: 17 February 2014
  • By: Jay Oyster

My son Liam is doing a Science expo project. It's sort of like a science fair, but in second grade they don't do judging. It's just a demonstration, and he'll get a participation ribbon. I don't really care about that, I just want him to start learning the scientific method.

He came up with a great idea. He wanted to put an ice cube in a frying pan and watch it dance around. I tried to work with him on that idea, but I realized two problems:

  1. There wasn't really a hypothesis he wanted to test. It was really just to watch something cool. I certainly don't object to that. Wanting to see something cool is at the heart of science. Plus, a demonstration of a concept is a valid topic for the expo, (not quite sure what the exact concept would be here) . . . BUT
  2. Hot frying pan in an auditorium filled with 7 year olds. Not going to happen.

Liam's first attempt at a Pinewood Derby Car. It's supposed to have a Minecraft theme. (He tends to be fairly abstract in his artwork.)I kind of steared him to do something related to our last project, which was the pinewood derby car he and I built for the Cub Scouts.